The Controller
A tour of the Controller: the stage preview, Start and skip buttons, the rundown, stage messages and the buttons at the top.
The Controller is where you run the show. This page goes through it a part at a time, so you know where everything is before the day.
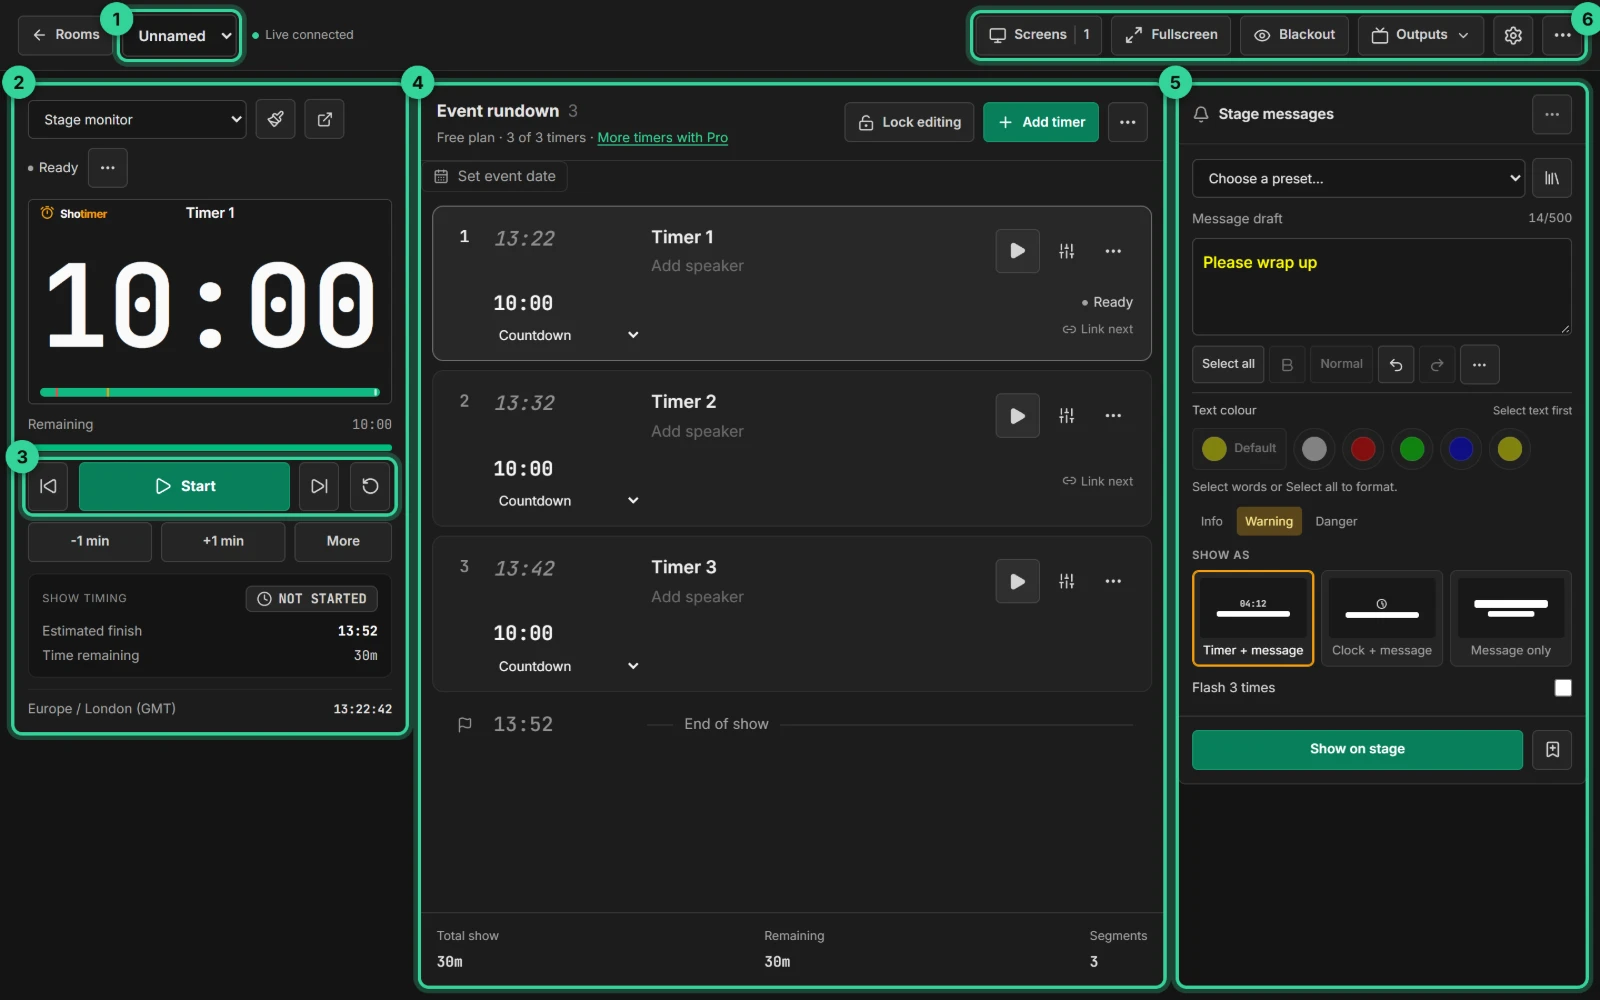
1. Room and connection
- Rooms takes you back to the dashboard. A running timer keeps running.
- The room name is also a list: choose another room to switch to it. Switching rooms stops playback on this Controller, so do it between shows.
- Next to it, Live connected means the Controller is talking to Shotimer and your screens. Press it for details. If it changes to Recovering… or Connection lost, see If the internet drops.
2. The stage preview
The preview shows exactly what your stage screens show, live.
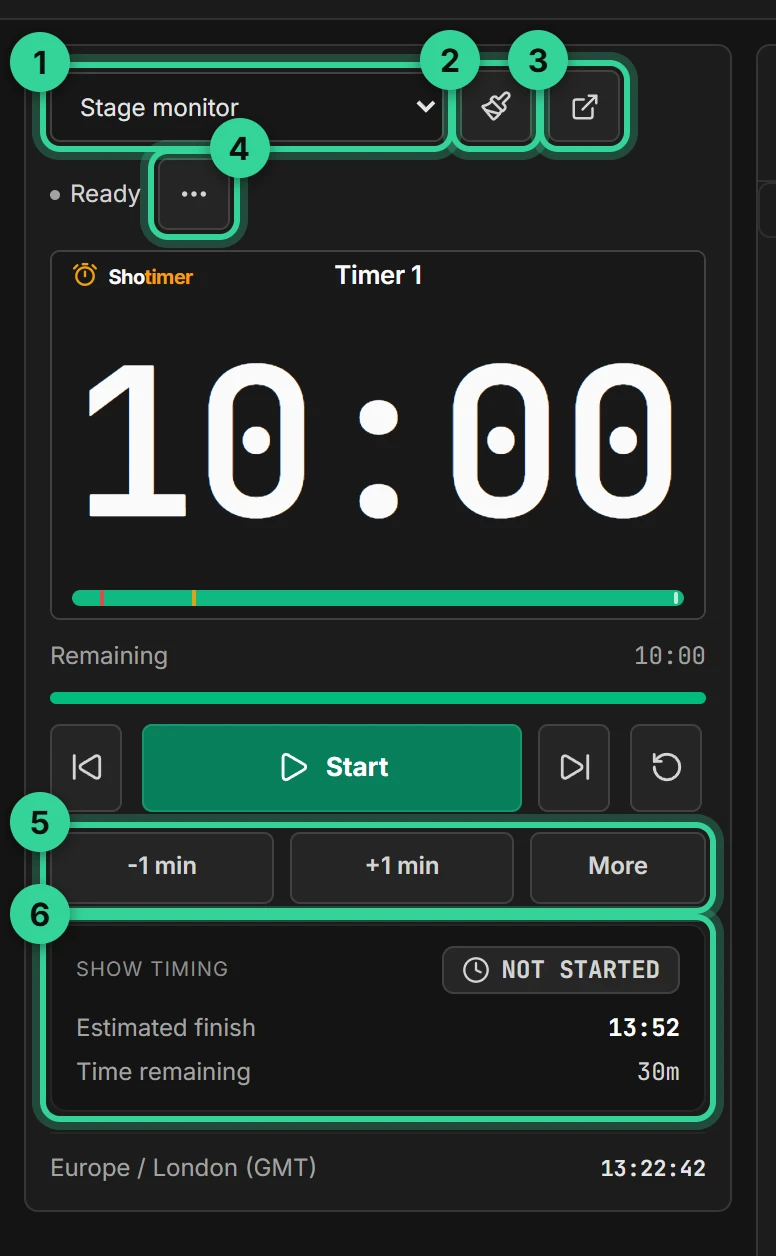
- The list switches the preview between Stage monitor, Agenda and Moderator. It only changes the preview, not your screens.
- The paintbrush opens Customize output. See Customise your screens.
- The arrow opens that output in a new tab, ready to drag onto a second screen.
- The three-dot menu holds Reset show timing and Reset stage appearance. See Resets.
- -1 min and +1 min change the time left on the running timer. More has 10 seconds, 30 seconds and 5 minutes.
- The Show timing panel says whether you’re running over or under, and when the show will finish. During the show it also has Start fresh and the live edits. See Show timing.
Next to the preview list, the small label says Ready, Running, Paused or Finished. The bottom line shows the room’s time zone and the time of day there. Click the time zone to change it in Room settings. If your device is somewhere else, Your time appears under it.
3. Start, pause and skip
- Start starts the selected timer. It changes to Pause while running, and Resume when paused.
- The arrows on either side go to the previous or next timer.
- The circular arrow puts the current timer back to its full time.
You can also do all of these from the keyboard. See Keyboard shortcuts.
4. The rundown
The middle column lists every timer in the room, in running order, each in its own box. Press the play button on a row to start that timer straight away. Click a title, speaker, start time or duration to change it. Above the timers are the event date and, once the room has labels, the label bar. Under the last timer is the End of show.
- Add timer adds one to the end.
- Lock editing stops accidental changes to the rundown on this Controller. Start, pause and messages still work.
- The three-dot menu changes how tall the rows are (Rows), and holds Print running order (a copy for the crew, on paper or as a PDF; see Print the running order), Restart rundown and Clear rundown.
- The bottom bar shows the total length of the show, the time remaining and the number of timers.
Everything about a single timer is on the Timers page.
5. Stage messages
The right-hand column sends silent messages to the speaker’s screen. On a tablet it opens from the Stage messages button at the top instead. See Stage messages.
6. The buttons at the top

- Screens shows how many devices are connected to this room, and lets you remove one. See Screens and access.
- Fullscreen fills the screen with the Controller.
- Blackout hides everything on every stage screen. Press it again, or press B, to bring the screens back.
- Outputs opens the stage monitor, Agenda or Moderator in a new tab, and has Share links & QR codes for other devices. See Put the timer on a screen.
- The room button (a cog) has two choices. Room settings has the event date, time zone, how times are written, overtime and timing (see Room settings). Name, backup and reset opens Event settings: the room’s name, quick switches for what the stage screen shows, backup and import, and Reset this room.
- The three-dot menu has help, sound and your account.
The three-dot menu
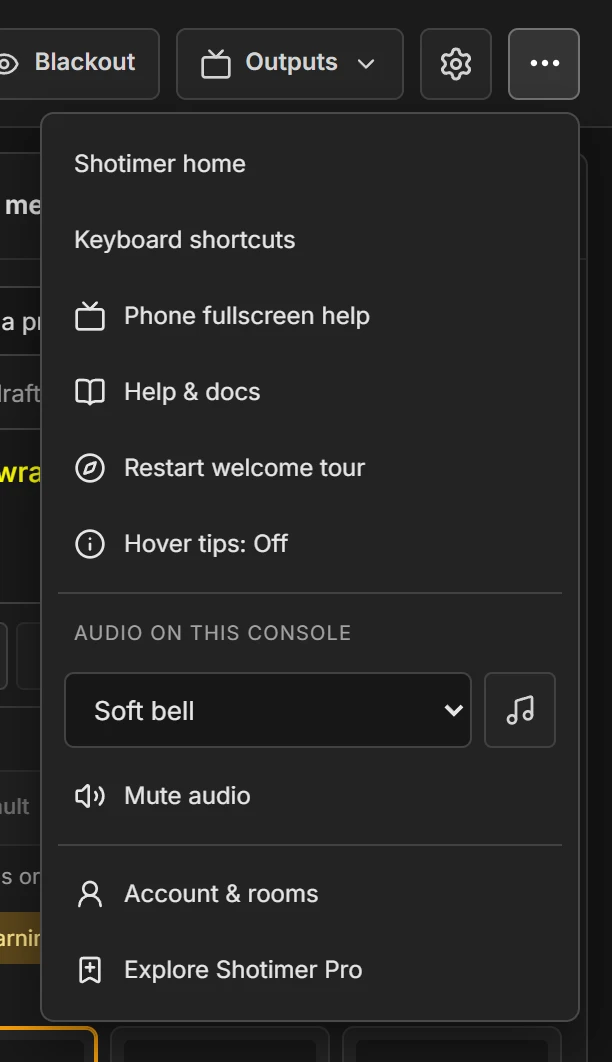
- Keyboard shortcuts lists every shortcut.
- Phone fullscreen help explains how to make a phone or tablet fill its screen.
- Help & docs opens these pages.
- Restart welcome tour runs the short tour of the Controller again.
- Hover tips explains a button when you rest the mouse on it. Turn them off once you know your way around.
- Audio on this console: choose a chime and press the note button to hear it, or Mute audio on this computer.
- Account & rooms opens your account. See Your account.