Timers
Countdown, count-up and time-of-day timers: durations, start times, labels, linking timers, what happens at zero, warning colours and chimes.
Each box in the rundown is one timer, also called a segment. From left to right it shows its number, start time, duration and type, title, speaker and labels, then its status and buttons. You can change most things straight from the box, and everything else from the timer’s settings.
Add a timer
Press Add timer above the rundown. Give it a title, an optional speaker and a duration, or start from a preset such as 10-minute talk, 30-minute panel or 15-minute break. The new timer goes at the end of the rundown.
The Free plan allows 3 timers per room. When a room is full, the rundown shows a More timers with Pro link.
Edit from the rundown
Click a title or speaker to change it. Click a start time to type a new one, or clear it to let Shotimer work it out (see Start times in the rundown). Click the duration to change it (see Duration and Target Time).
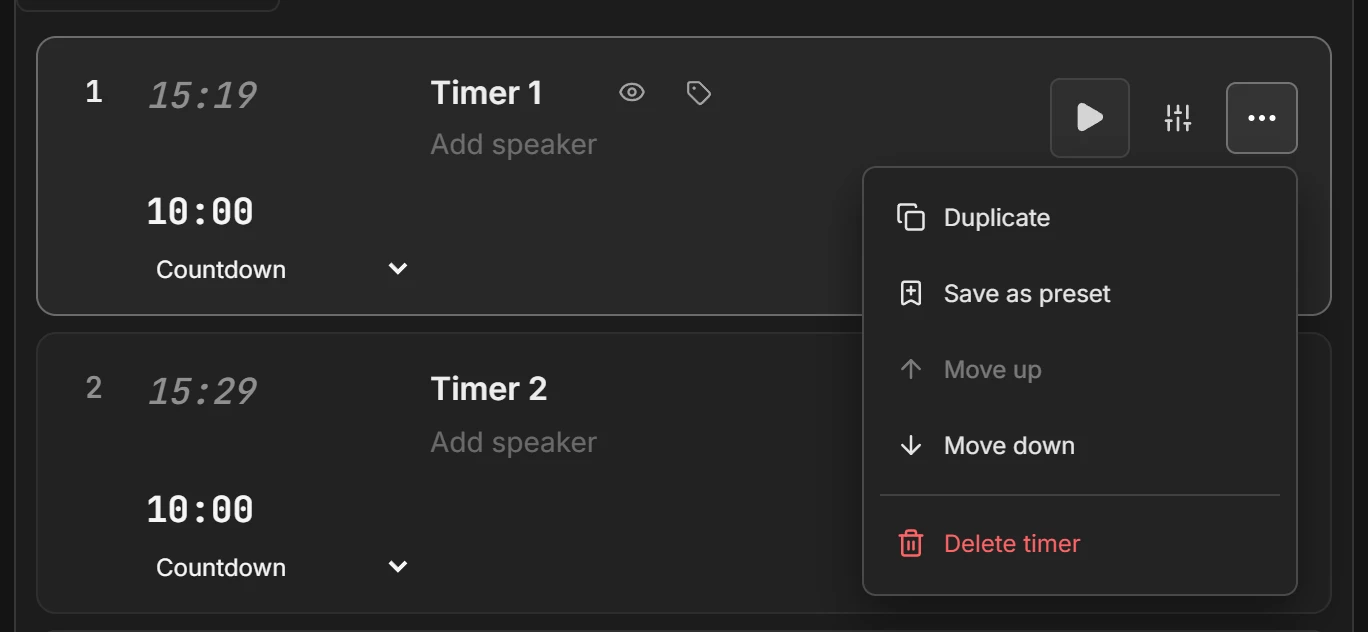
The three-dot menu on each row can Move up, Move down, Duplicate, Save as preset or Delete timer. After deleting, you have 15 seconds to press Undo. During a show, a deleted timer stays in the rundown as a faint CUT row instead, so you can put it back (see Undo live edits).
Duration and Target Time
Click a timer’s duration to open its duration box. The list at the top chooses how long the timer runs:
- Duration counts down for a set length. Type the hours, minutes and seconds. The minutes are selected when the box opens, so you can type a number and press Enter. Escape closes the box without changing anything.
- Target Time counts down to a time of day, such as
14:30. Its length is worked out when it starts: a break that must end at 10:45 runs 15 minutes if it starts at 10:30, and 7 minutes if it starts late at 10:38. If the time has already passed when it starts, it goes straight into overtime. The row shows until 14:30 instead of a length.
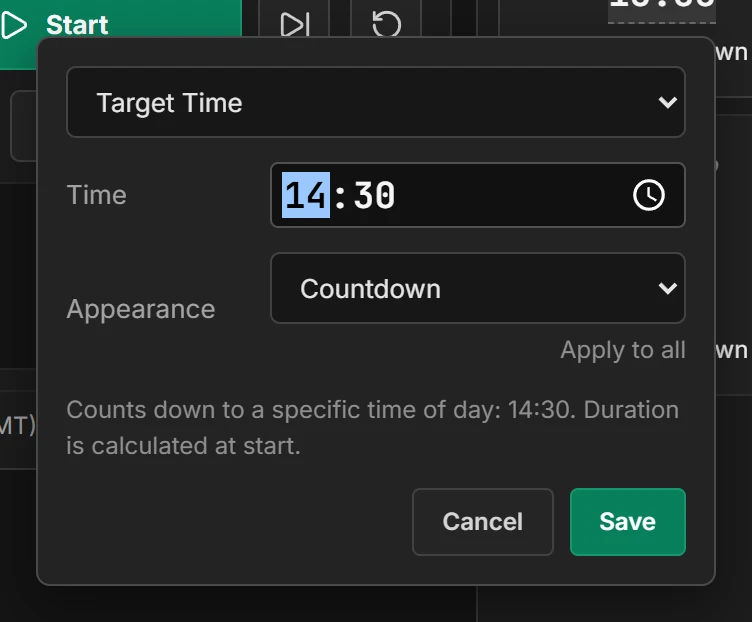
The box also has the timer’s Appearance (the same as its type, below). Apply to all gives every timer in the room that appearance. Press Save to keep your changes.
You can change the duration of the timer that’s playing. It keeps the time it has already run: changing a 10-minute timer to 15 minutes two minutes in leaves 13 minutes to go. Changing a playing Target Time timer’s time moves its end straight away.
Labels
Labels are small coloured tags on a timer that tell the crew what else happens during it, apart from someone talking. Anyone glancing at the rundown can see which items need their attention. For example:
- VT: a video plays, such as a sponsor film or a walk-on video.
- GFX: graphics go up on screen, such as slides or a name caption.
- CAM: a particular camera matters, such as CAM-2 on the panel.
- MUSIC: walk-on music, a band or a playout track.
- BREAK: coffee, lunch or a stage changeover.
- Q&A: questions from the audience, so the roving microphones are ready.
You can name labels anything you like, such as SPONSOR, PANEL, LIVE STREAM or a person’s name. They show on the Controller and printed running orders. Speakers never see them on the stage screen. With Shotimer Pro (coming soon), the Agenda can show them too: see Customise your screens.
Add a label
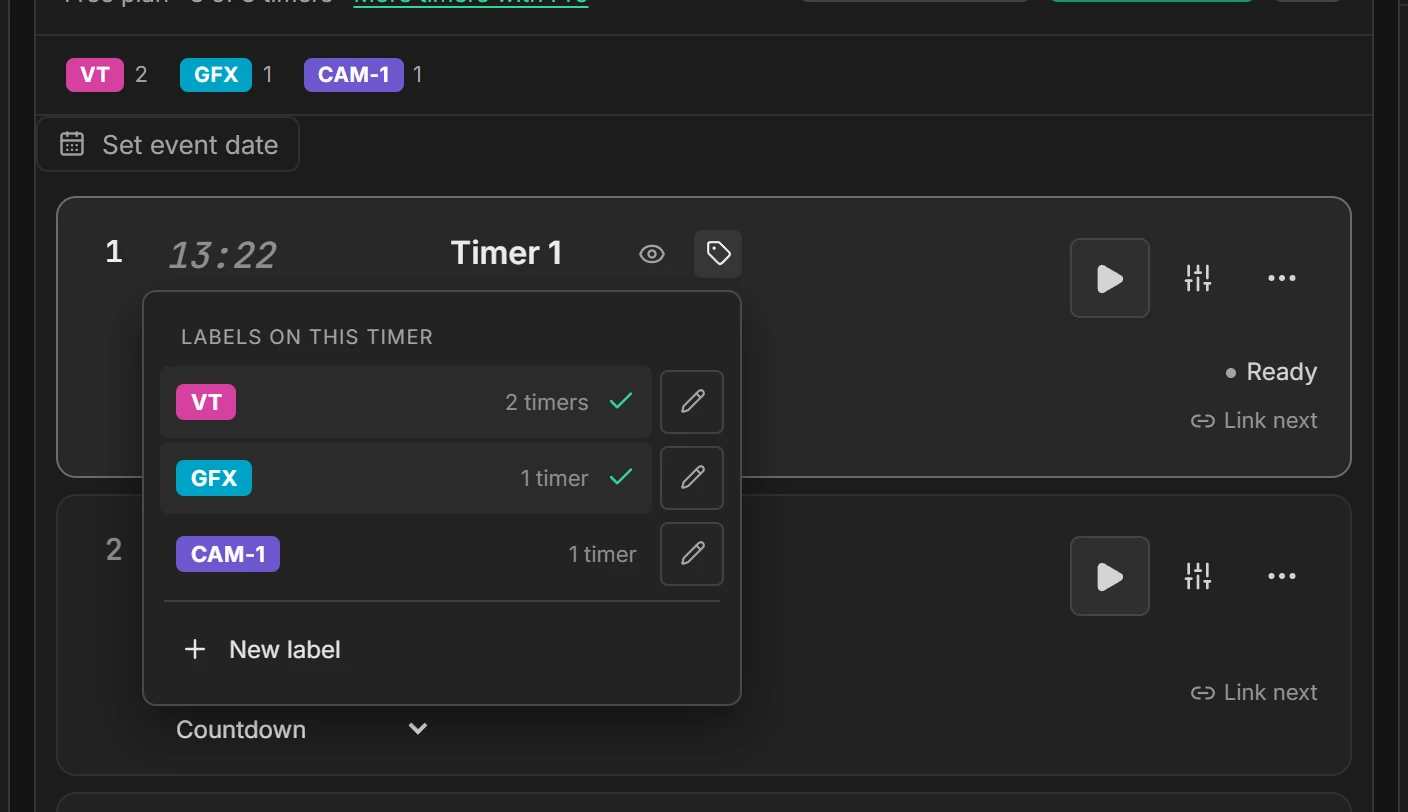
Point at a row and press the tag button at the end of its title line. On a phone or tablet it’s always there.
- Press New label. Click a ready-made label (VT, GFX, CAM, MUSIC, BREAK or Q&A; only the ones the room isn’t using yet are shown), or make your own: type a name of up to 16 characters and choose one of 12 colours. In a room with no labels yet, the ready-made ones appear straight away.
- After that, the list shows every label in the room. Tick a label to add it to this timer, or untick it to take it off. A timer can have up to 8 labels.
- Click a label on a row to open the list again.
Rename, recolour or delete a label
In the list, press the pencil beside a label. Change its name or colour and press Save: every timer with that label changes too. The window says how many timers use it. To remove a label from all of them, press Delete, then press it again to confirm.
Highlight one kind of item
Once a room has labels, a bar above the rundown lists them with how many timers have each one. Click a label to fade every timer that doesn’t have it, for example to check all the videos before the show. Click it again, or press Show all, to go back. This only changes your own screen.
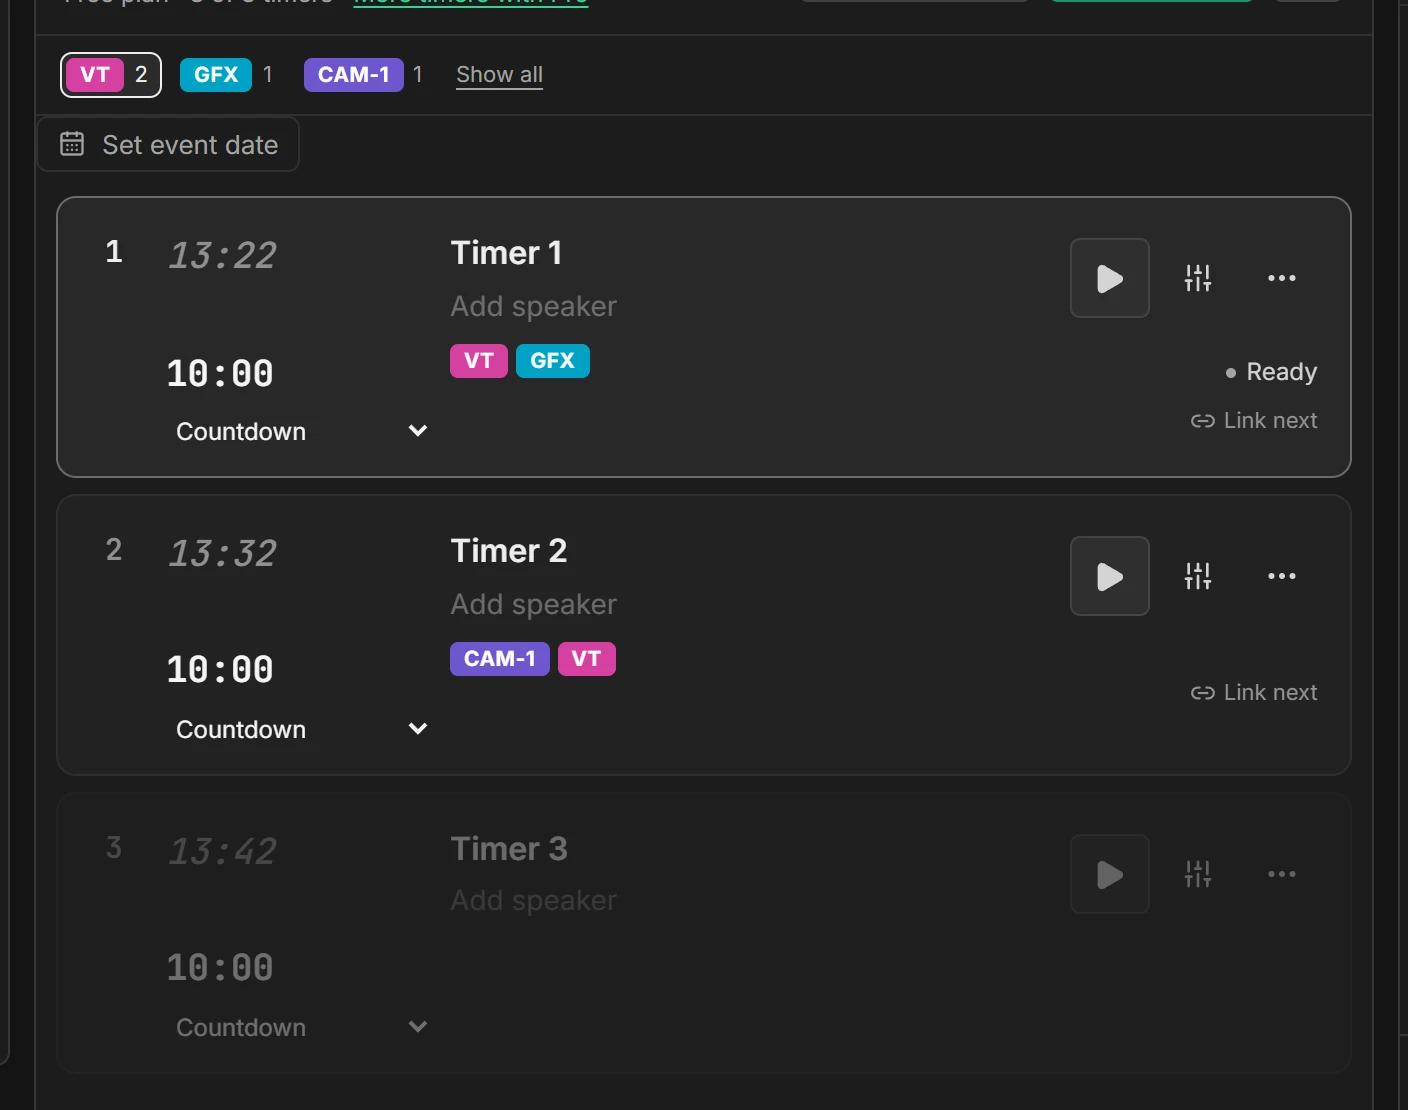
Labels are saved with the room, appear on every Controller, and are included in backups, presets, spreadsheets and the printed running order. While Lock editing is on, labels can’t be changed.
Timer settings
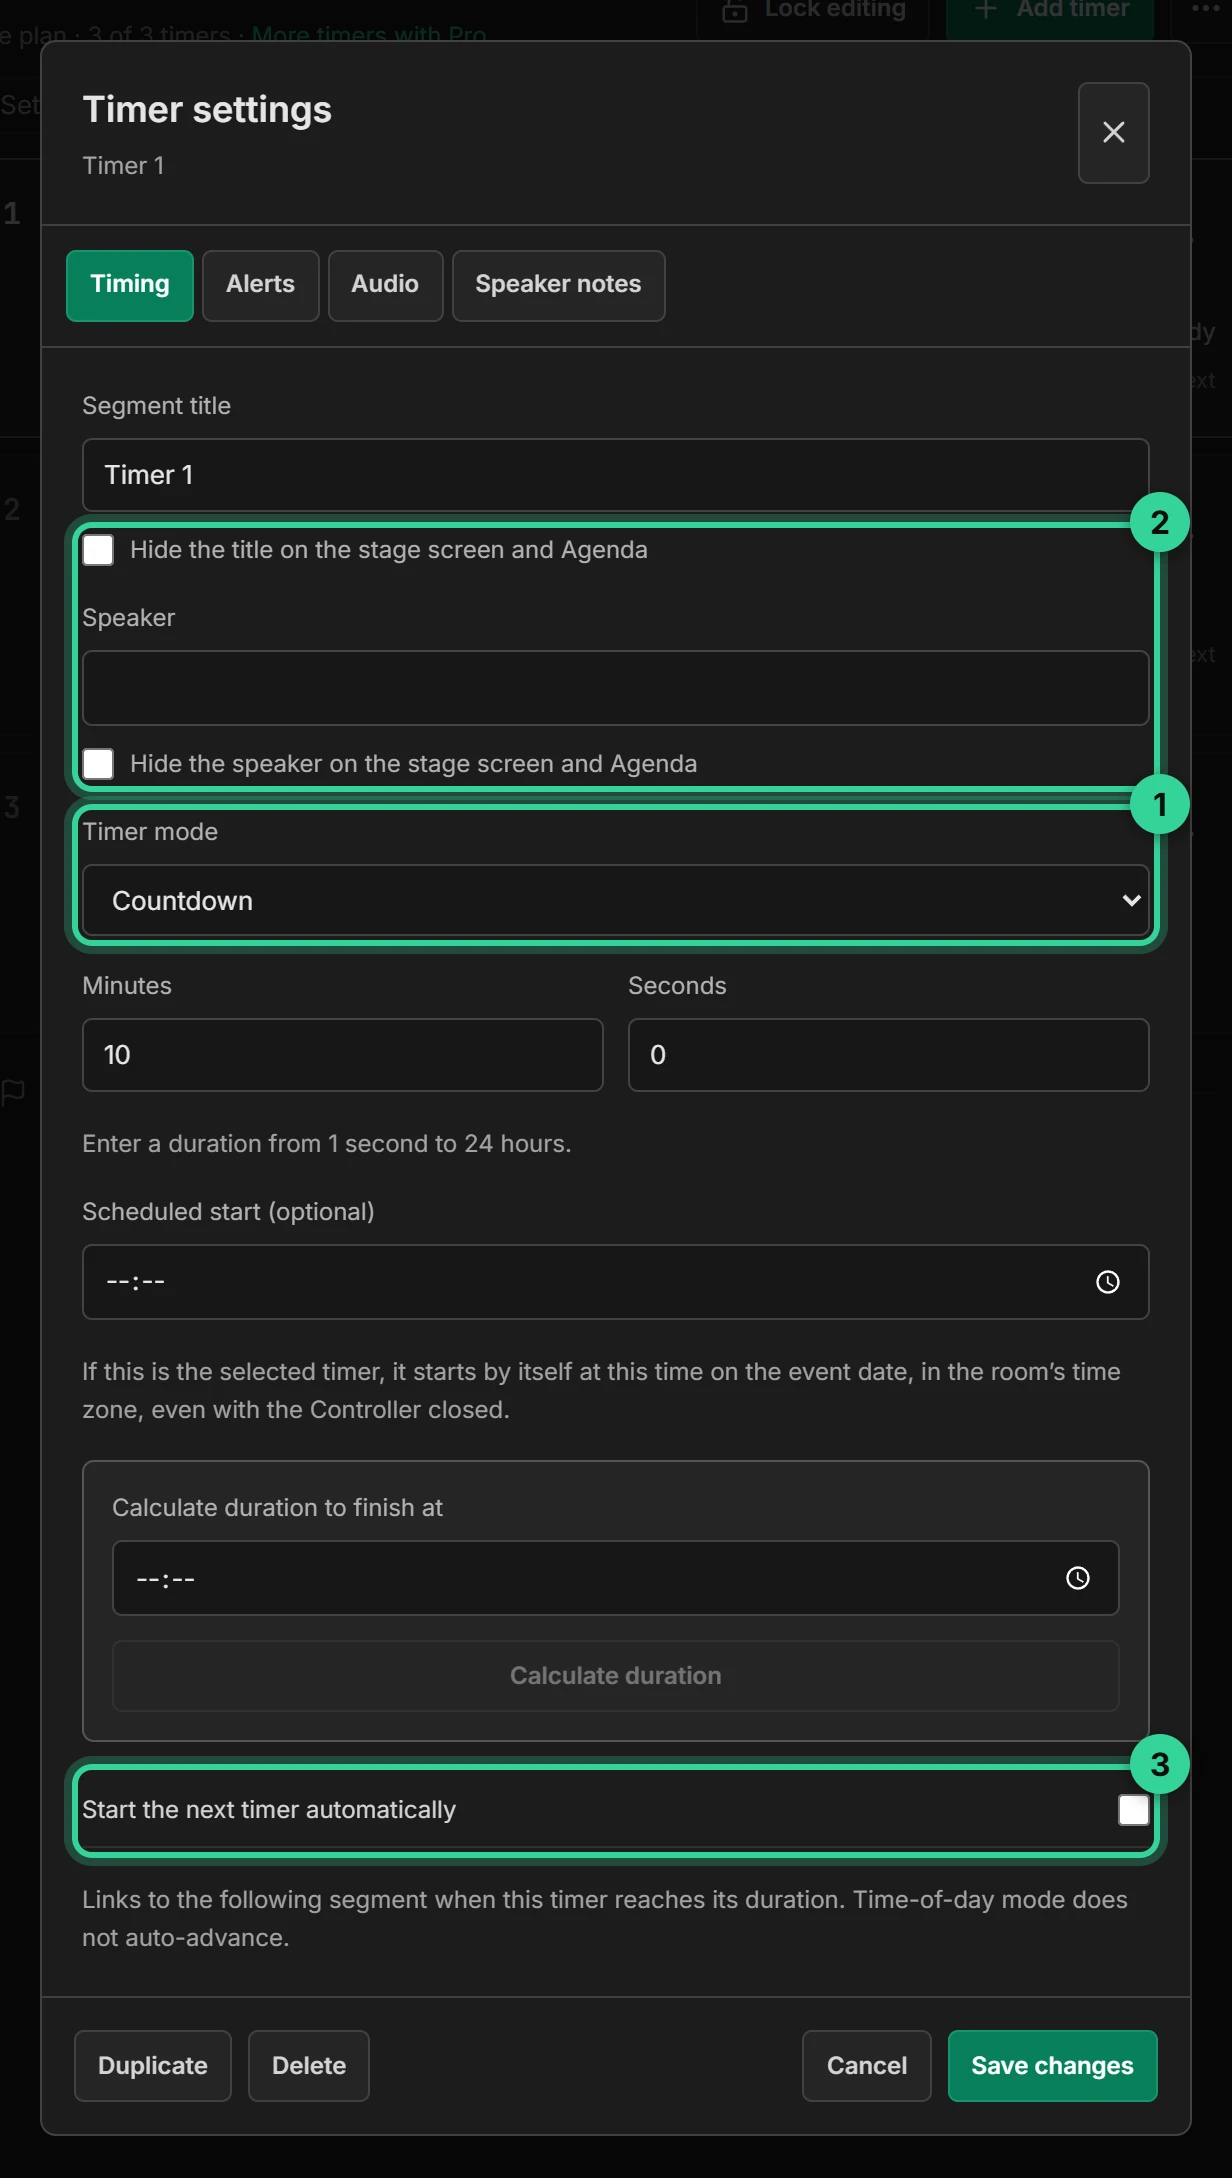
Press the settings button on a row (the one that looks like sliders) for everything else. The settings have four tabs: Timing, Alerts, Audio and Speaker notes. Press Save changes when you’re done.
Choose the timer type
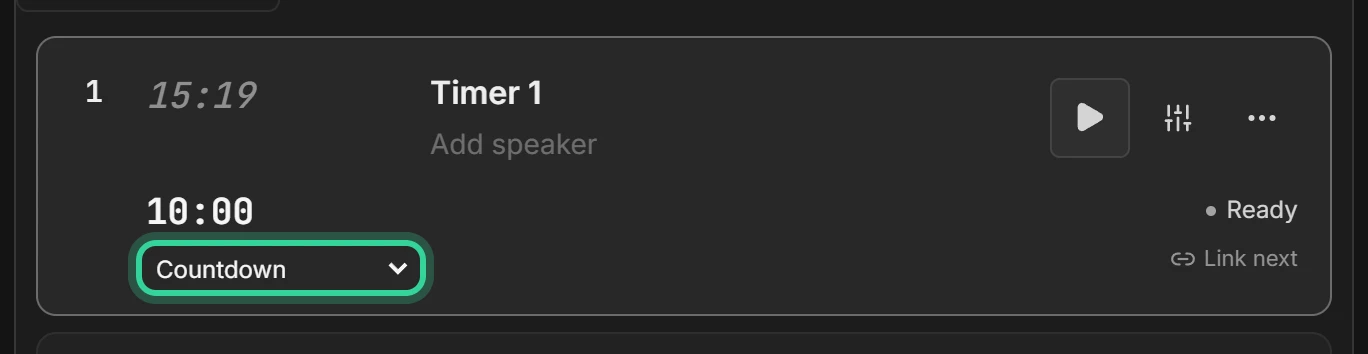
Under each timer’s duration is its type. Click it to choose. You can change it while the timer is playing: it switches straight away and keeps the time already run.
- Countdown counts down to zero. This is the usual choice.
- Count up counts up from zero to the duration.
- Time of day shows the current time. Its duration only reserves time in the schedule.
- Countdown + clock and Count up + clock work the same, with the time of day shown large under the timer. It steps aside while a message is on stage.
- Hidden keeps the timer running, but the stage screen doesn’t show it. The title, messages and the Moderator page still work. Use it when the speaker shouldn’t see the time.
The same choice is in the duration box as Appearance, and Countdown, Count up or Time of day is in the timer’s settings as Timer mode. How clocks and timers are written, such as 2:30 PM or 14:30, is set for the whole room in Room settings.
What happens at zero
Whether timers keep counting past zero (overtime) or stop at 0:00 is set for the whole room, in Room settings. Overtime is the default, so you can see how far over the speaker is.
Hide the title or speaker
For a surprise guest, hide a timer’s title or speaker from the screens. Point at the title or speaker and press the eye button beside it, or use the ticks on the Timing tab of the timer’s settings.
- A hidden title or speaker shows in italics on the Controller, with a crossed-out eye.
- The stage screen doesn’t show it, including in Up next. The Agenda shows To be announced instead of a hidden title.
- The Controller, the Moderator view and printed running orders still show it.
Press the eye again to show it.
Start the next timer automatically
Click Link next on a row, or tick Start the next timer automatically in its settings, and the next timer starts the moment this one reaches zero. The row then shows Auto next. You can also choose Linked in the next timer’s start time box (see How a timer starts).
Linked timers are joined in the rundown by a short blue line marked Auto-starts, and the next timer’s start time has a link icon, so a chain of linked timers reads as one block. Point at Auto-starts to see which timer starts which, and click it to unlink them.
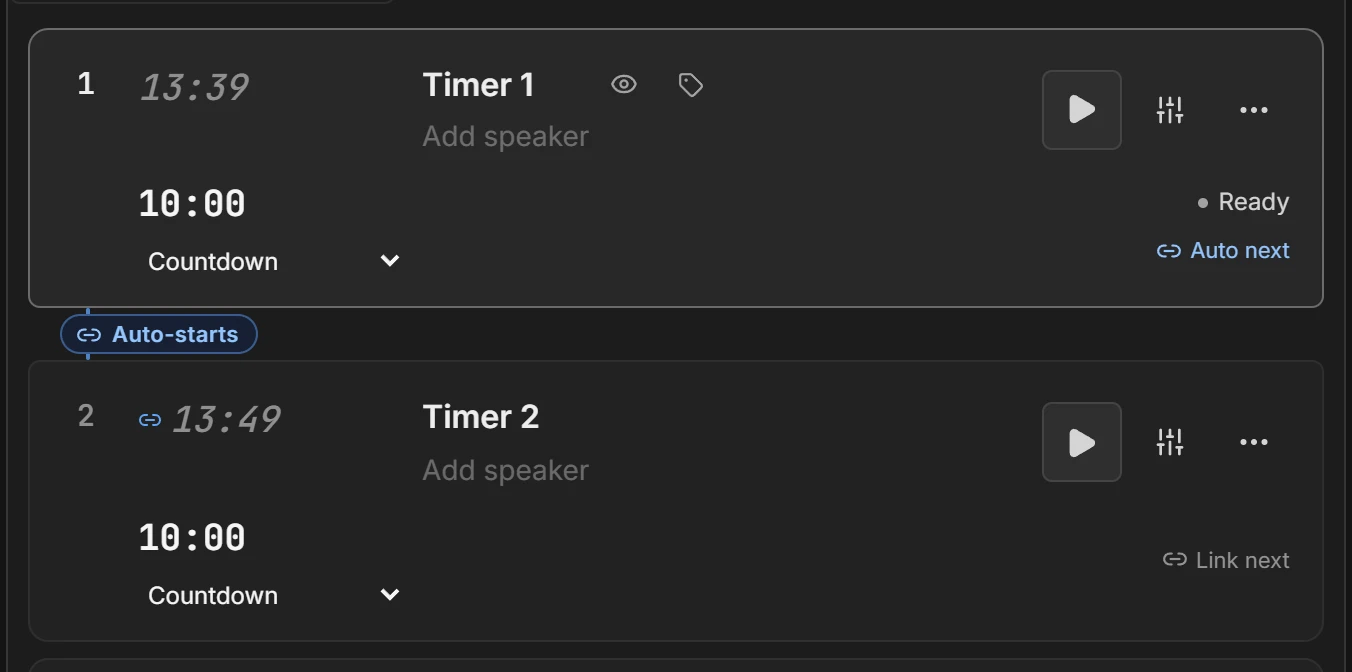
Linking takes priority over the room’s overtime setting when another timer follows. Time-of-day timers don’t start the next one. A linked timer starts when the one above reaches zero, so a start time typed on it is ignored.
Finish at a set time
To make a timer always end at a set time, however late it starts, use Target Time. To set a fixed length from a finish time once, the timer’s settings also have Calculate duration to finish at: enter the end time, such as 14:30, and press Calculate duration.
Warning colours
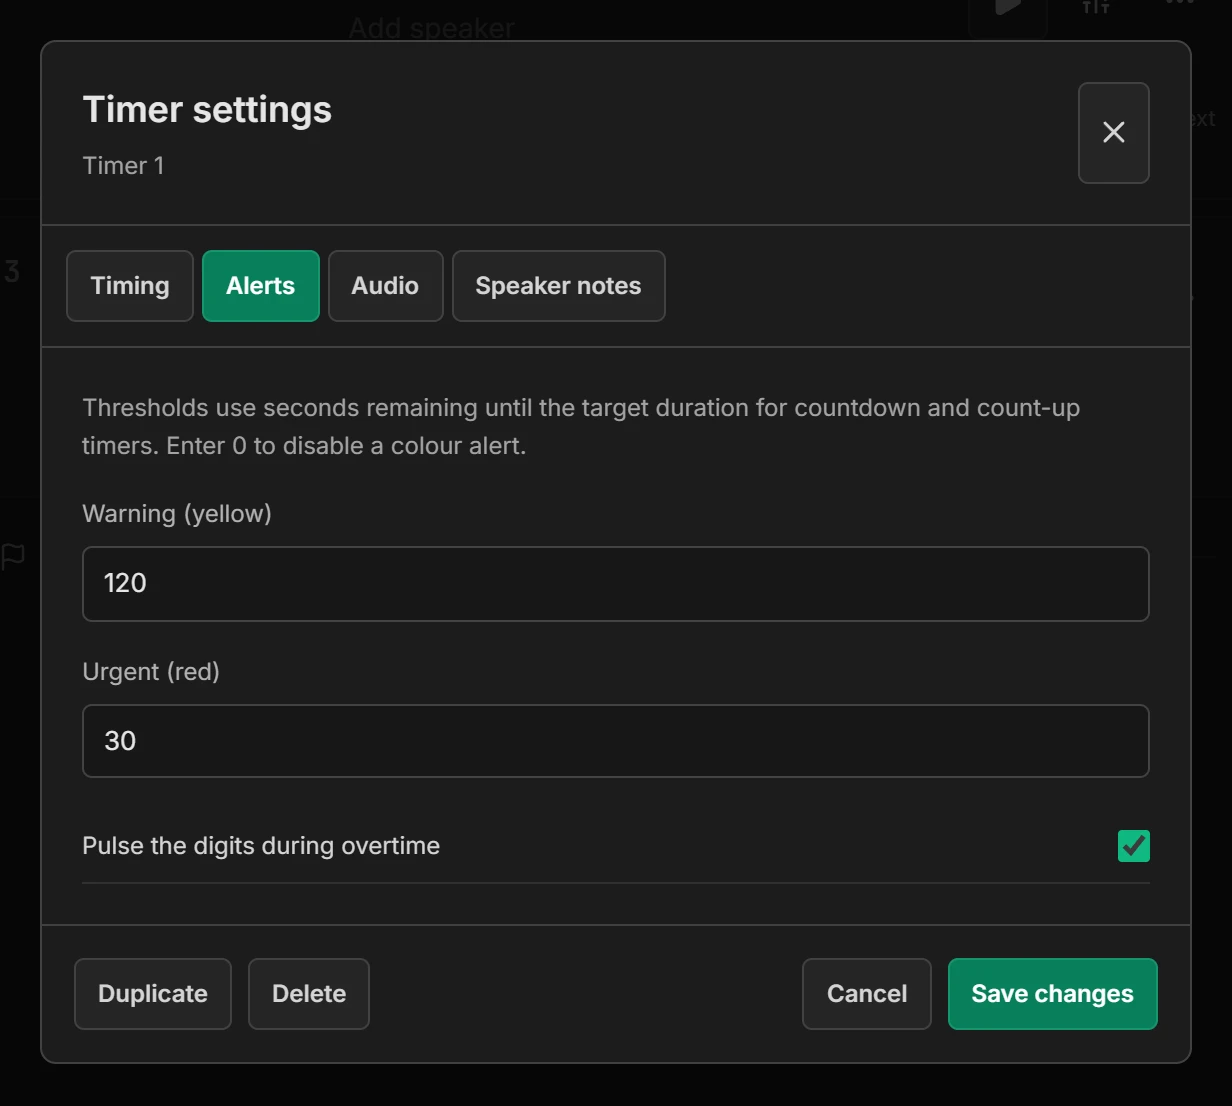
On the Alerts tab, set when the timer turns yellow and red, in seconds remaining. The defaults are 120 (2 minutes) and 30. Enter 0 to switch a colour off. You can also make the digits pulse during overtime.
Chimes
On the Audio tab, switch on any of these, and set the volume:
- Chime at yellow warning, using the chime you choose: soft bell, marimba, deep gong or alert beep. Press Test warning chime to hear it.
- Beep at red warning.
- Gong at the target duration, when the timer reaches zero.
Sounds play on the Controller that has control, not on stage screens. Your browser may ask permission to play sound. To silence all chimes on this Controller, use Mute audio in the three-dot menu at the top right.
Speaker notes
On the Speaker notes tab, add notes or cues for the segment, up to 4,000 characters. They appear on the Moderator view, and on stage monitors only if speaker notes are switched on there. They never appear on the Agenda.