Customise your screens
Choose what the stage monitor, Agenda and Moderator view show and, with Pro, their colours, fonts, logo and the Agenda’s accent colour.
Every room has three kinds of screen: the stage monitor for the speaker, the Agenda for attendees and crew, and the Moderator view for a host. You can choose what each one shows and, with Pro, how it looks. Changes are a draft until you press Apply to live screens, so you can try things out without anyone seeing.
1. Open Customize output
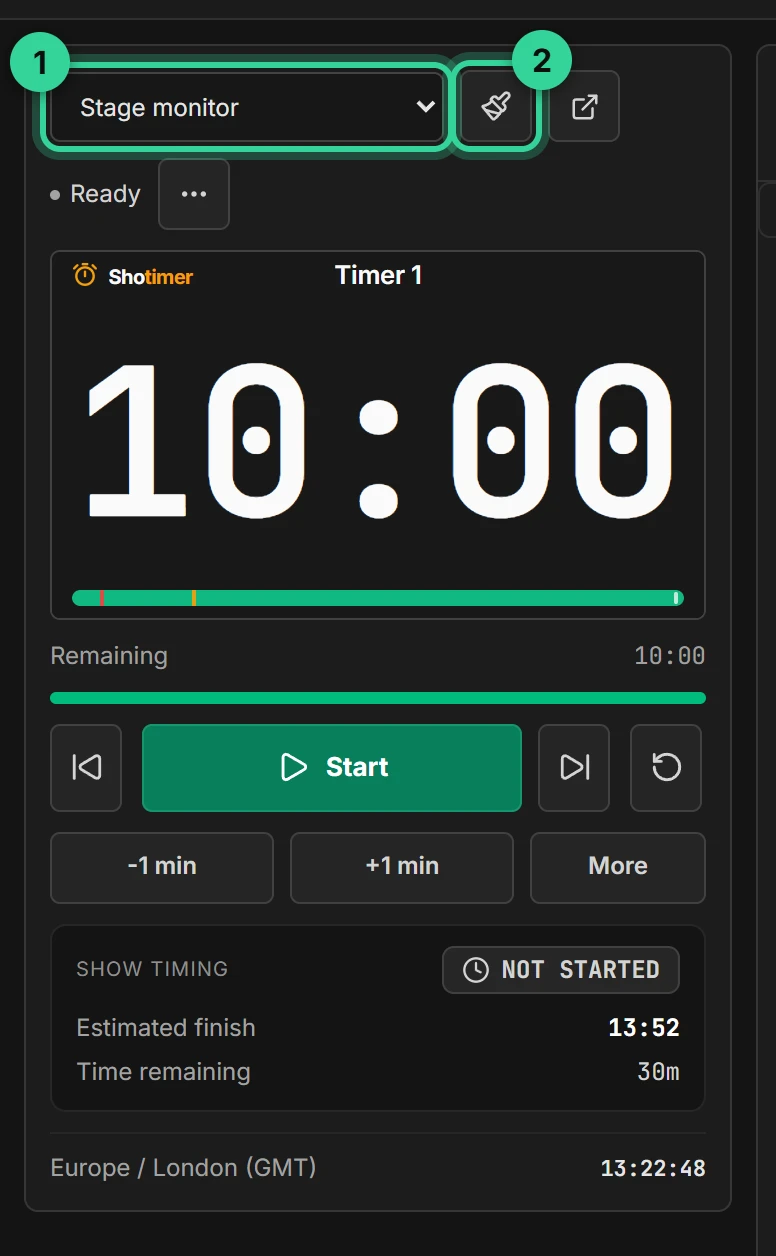
On the Controller, choose Stage monitor, Agenda or Moderator in the list above the preview, then press the paintbrush next to it. You can also switch between them inside the window that opens.
2. The Customize output window
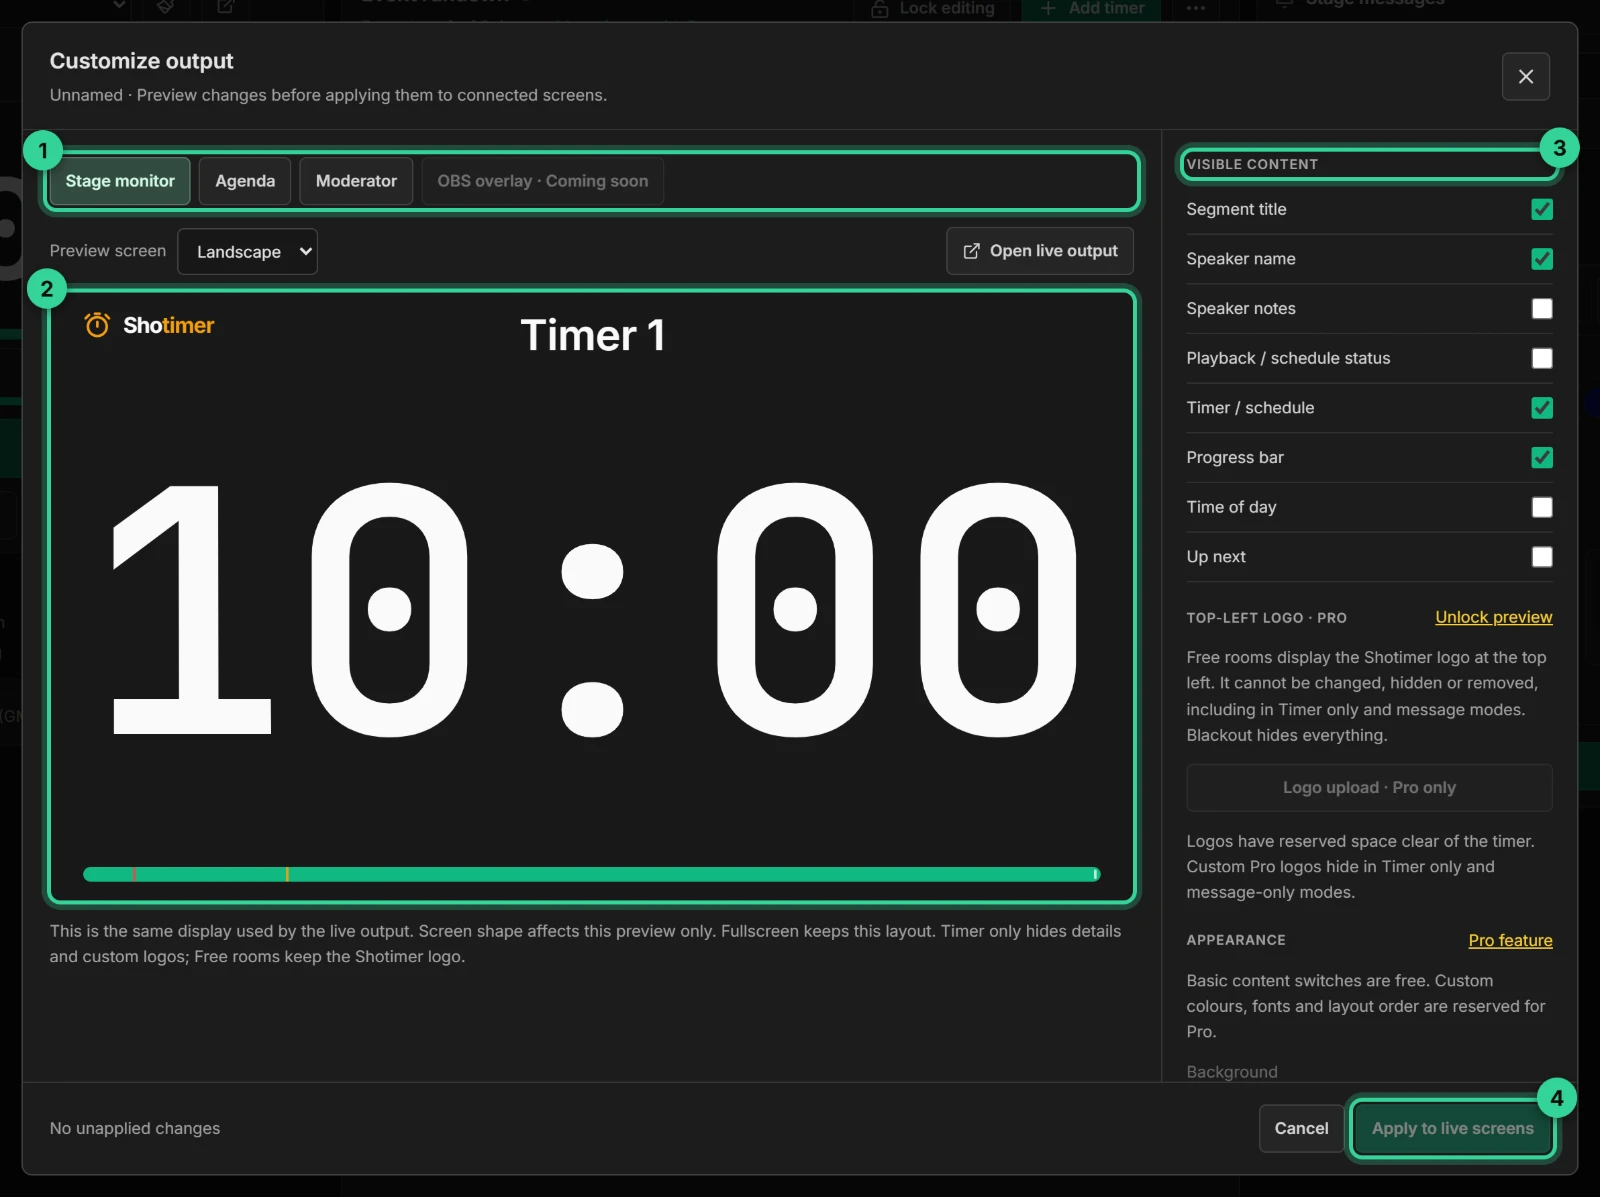
- The tabs choose which kind of screen you’re changing. Each one has its own settings.
- The preview shows your draft, using the real show. Preview screen switches it between Landscape and Portrait, to check how it looks on a TV or an upright screen. That only changes the preview; every screen fits itself.
- Visible content turns each item on or off. These switches are free on every plan.
- Apply to live screens sends your changes to every screen of that kind in this room.
Further down the right-hand side, Appearance holds the Pro settings: colours, fonts, custom text and more. See Colours, fonts and logos.
3. The stage monitor
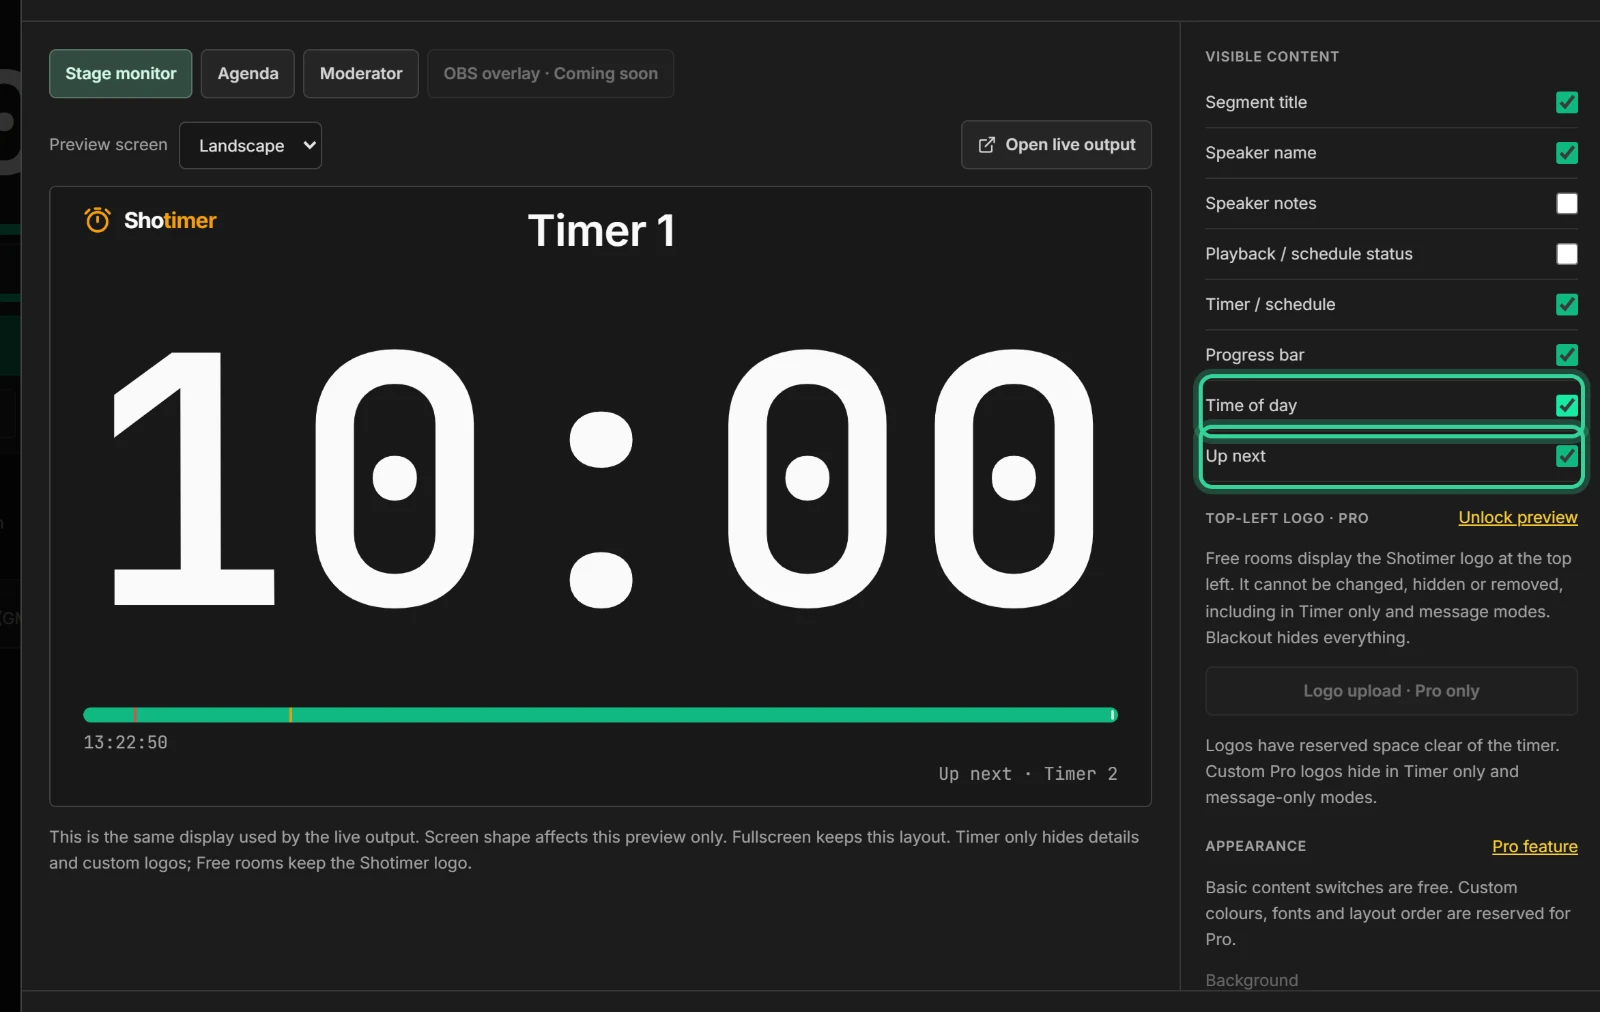
On the Stage monitor tab you can show or hide:
- Segment title and Speaker name, at the top. On at first.
- Speaker notes, the notes you wrote for the timer. Off at first, because the audience may see the screen.
- Playback / schedule status, such as Running or Paused.
- Timer / schedule, the big numbers.
- Progress bar, the bar along the bottom. It shrinks as time runs out and turns yellow, then red, at the timer’s warning times. Two small marks show where yellow and red begin, so the speaker can see them coming.
- Time of day, the current time.
- Up next, the next timer’s title.
The most used ones are also in Event settings (the settings button at the top of the Controller), under Stage monitor basics.
To hide everything except the timer on just one screen, use Timer only on that screen instead. See Put the timer on a screen.
4. The Agenda
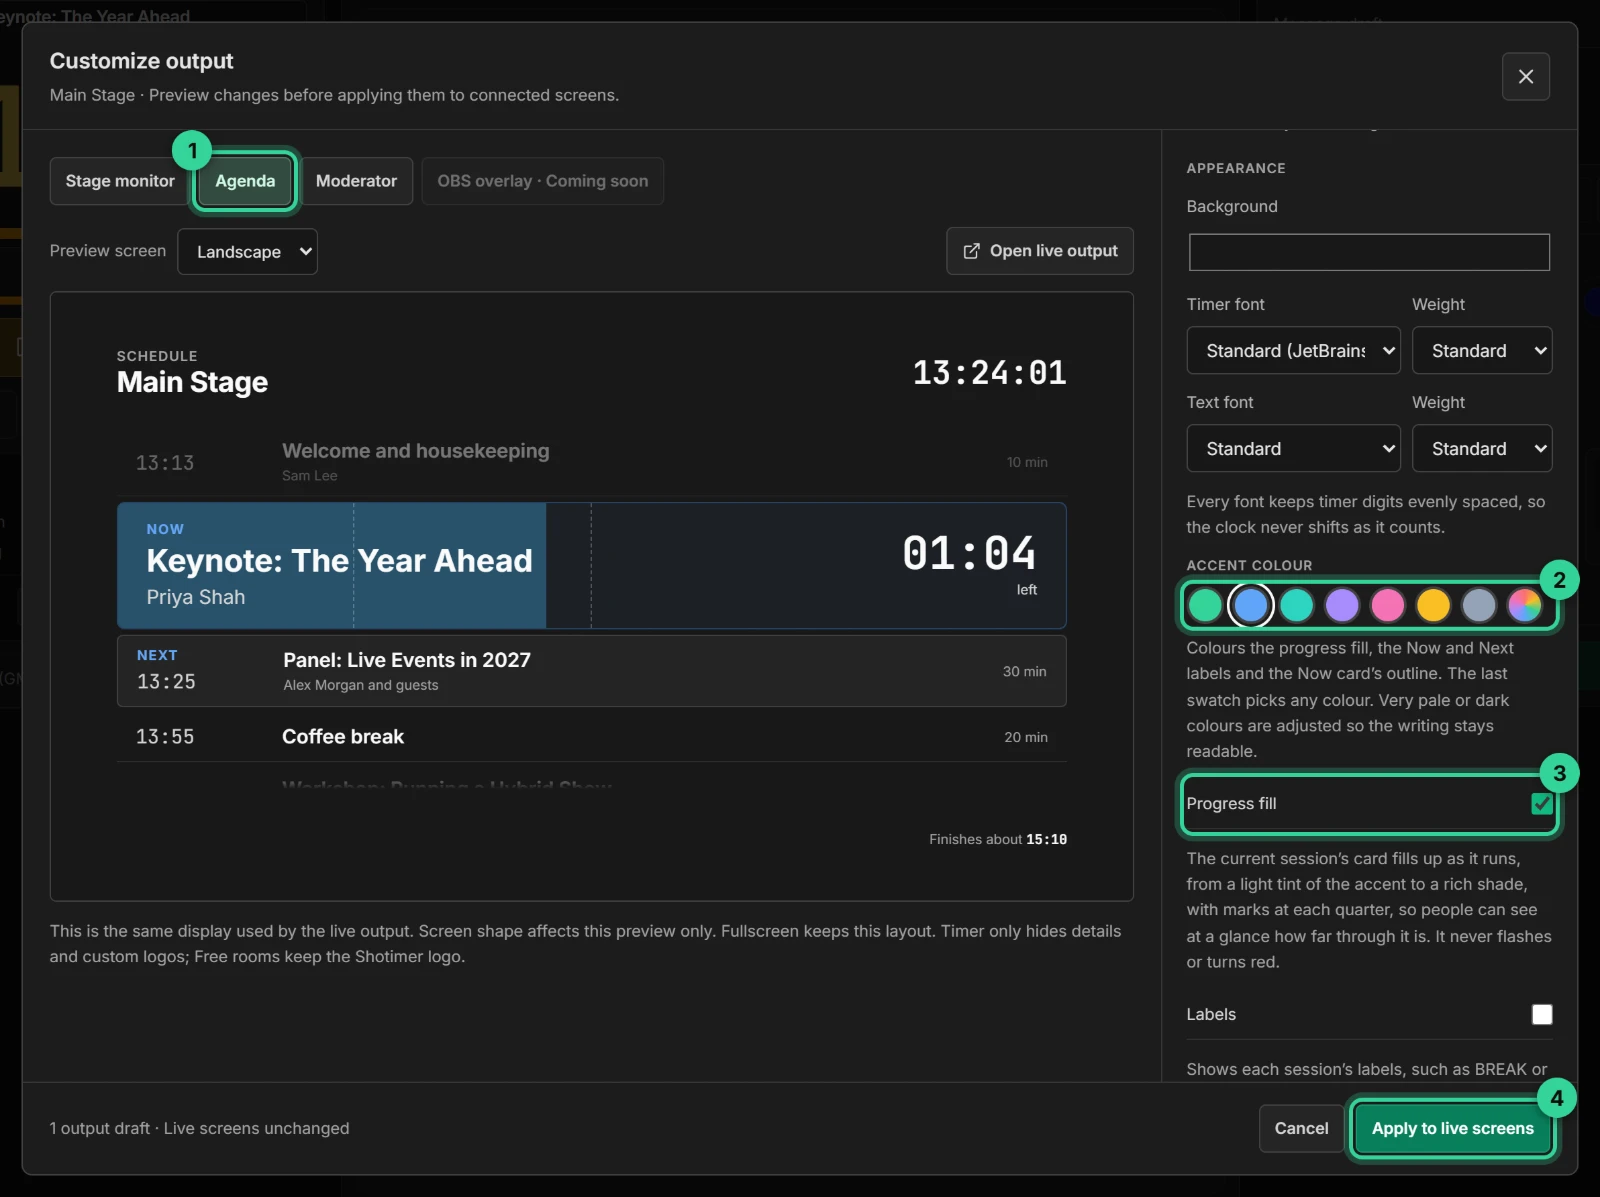
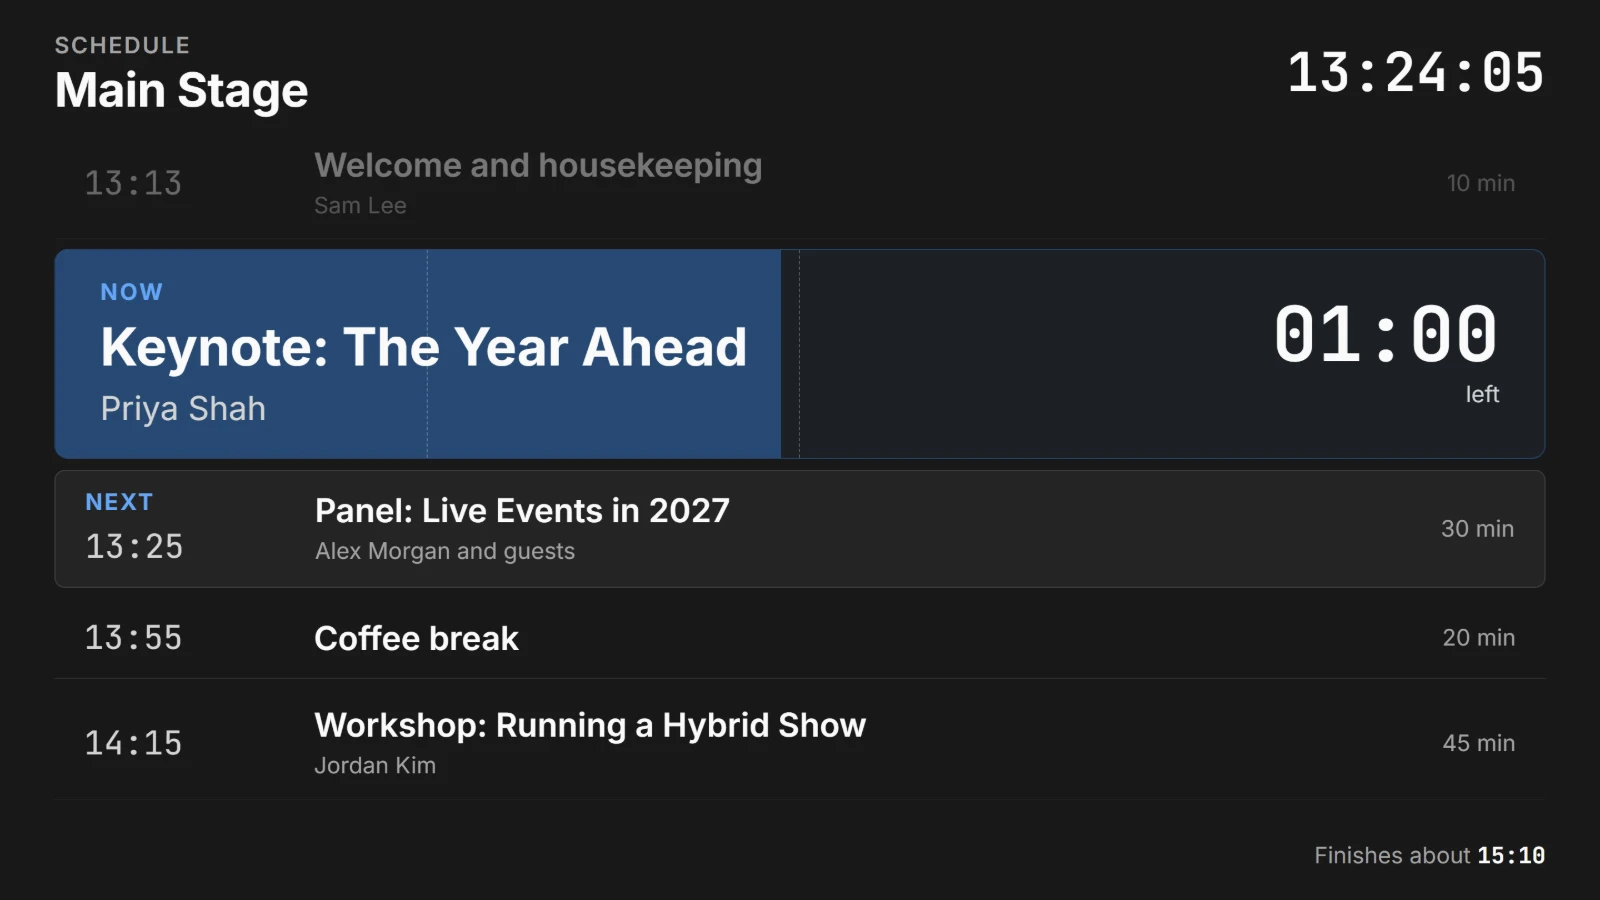
The Agenda is the schedule for attendees: what’s on, who’s speaking and when. On the Agenda tab you can show or hide:
- Estimated finish: “Finishes about 16:20” at the bottom.
- Time of day, the clock at the top right.
- Earlier sessions, shown faded above the current one.
- Behind or ahead, how late or early the show is running. It’s off at first, because the audience may see the Agenda; it’s useful on crew screens.
With Pro, under Appearance:
- Accent colour: choose Green, Blue, Teal, Purple, Pink, Amber or Slate grey, or the rainbow swatch at the end for any colour, such as your brand’s. It colours the progress fill, the Now and Next labels and the Now card’s outline.
- Progress fill: the Now card fills up as the session runs, from a light tint of the accent to a rich shade, with faint marks at each quarter. Anyone walking past can see “about halfway” at a glance. It never flashes or turns red.
Shotimer keeps the Agenda readable whatever you choose. A light background, such as white, switches it to dark writing, and very pale or very dark accent colours are adjusted so the labels and the writing on the card always show.
On the Free plan, the Agenda uses the standard green with a thin progress bar. See Agenda and Moderator views.
5. The Moderator view
On the Moderator tab you can show or hide the time left (Timer / schedule), Speaker notes, Up next and the Time of day. The Stage messages panel next to it always stays, so the moderator can still send messages.
6. Apply, or start again
- Apply to live screens updates every connected screen straight away. Screens that are offline catch up when they reconnect. You can change several tabs and apply them together.
- Cancel closes the window. If you have changes that weren’t applied, it asks first.
- Preview defaults for this output puts the draft back to the standard layout. Press Apply to live screens to use it.
- Reload this output from live throws away your draft and starts again from what the screens show now.
- Reset live stage appearance puts the stage monitor back to the standard look straight away. See Resets.
Settings belong to the room, so every screen of the same kind in the room looks the same.
Colours, fonts and logos (Pro)
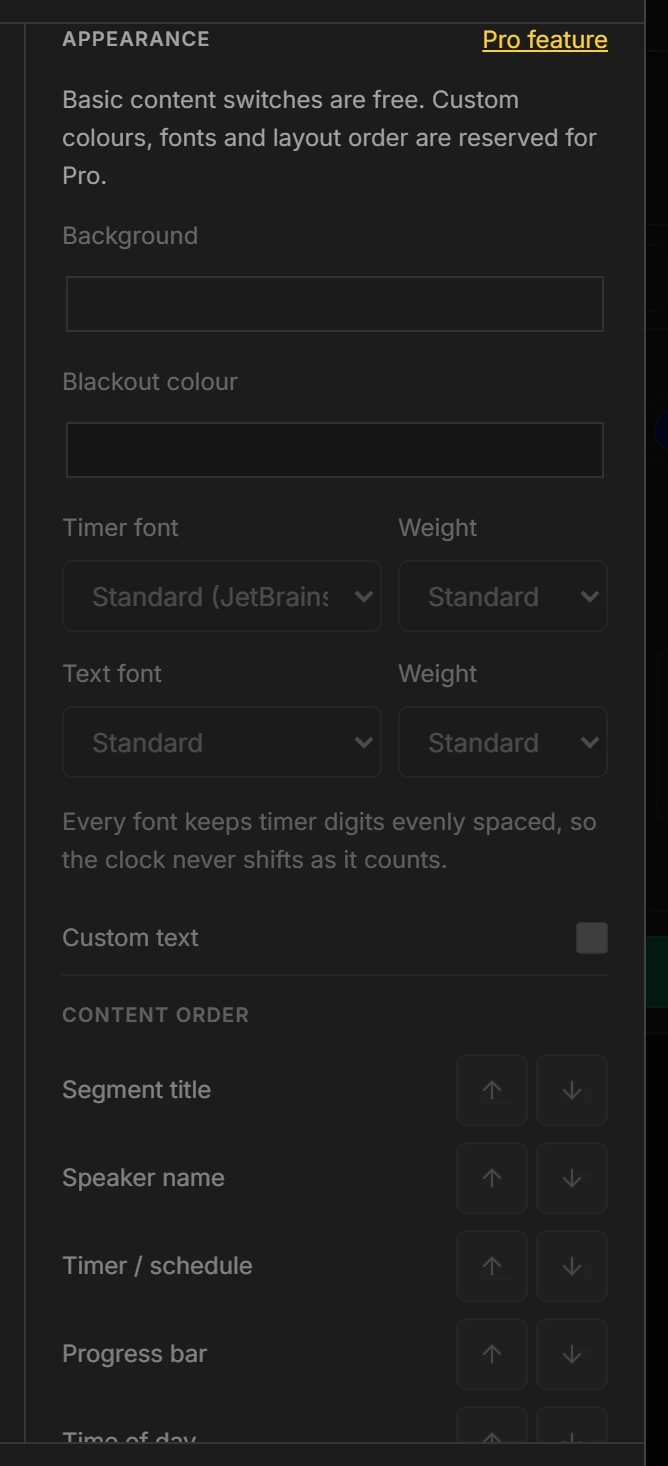
With Shotimer Pro, which is coming soon, you’ll also be able to change:
- Background on each kind of screen, and the stage monitor’s Blackout colour, for example pure black.
- Timer font and Text font, each with a weight, from a choice of 8. Every font keeps the digits the same width, so the numbers don’t jump about as they count.
- Custom text, a line of up to 200 characters, such as the event’s name or a Wi-Fi password.
- Content order on the stage monitor, moving items up or down the screen.
- Top-left logo on the stage monitor tab: your own logo or a sponsor’s, as a PNG, JPG or WebP file up to 2 MB, in Small, Medium or Large. It shows on the Agenda too. On Pro you can also leave that corner empty.
- The Agenda’s Accent colour and Progress fill, described above.
On the Free plan, the Shotimer logo shows in the top-left corner. If a room goes back to Free, its screens show the standard look, and your colours, fonts and logo come back if you upgrade again. See Free and Pro.
Quick reference
| Setting | Which screens | Plan |
|---|---|---|
| Show or hide items | All three | Free |
| Background colour, fonts, custom text | All three | Pro |
| Blackout colour, content order | Stage monitor | Pro |
| Logo | Stage monitor and Agenda | Pro |
| Accent colour, progress fill | Agenda | Pro |
| Labels | Agenda | Pro |